There is something quietly magical about paperwhites in winter. They bring your house alive, adding that pop of fresh green when not much else is truly growing fresh. When the garden is bare and the days are short, these simple bulbs bring life back into the house in the most unassuming way. I have always loved that paperwhites ask very little of us. A vessel, a bit of water, some patience, and suddenly the kitchen or dining room feels alive again.
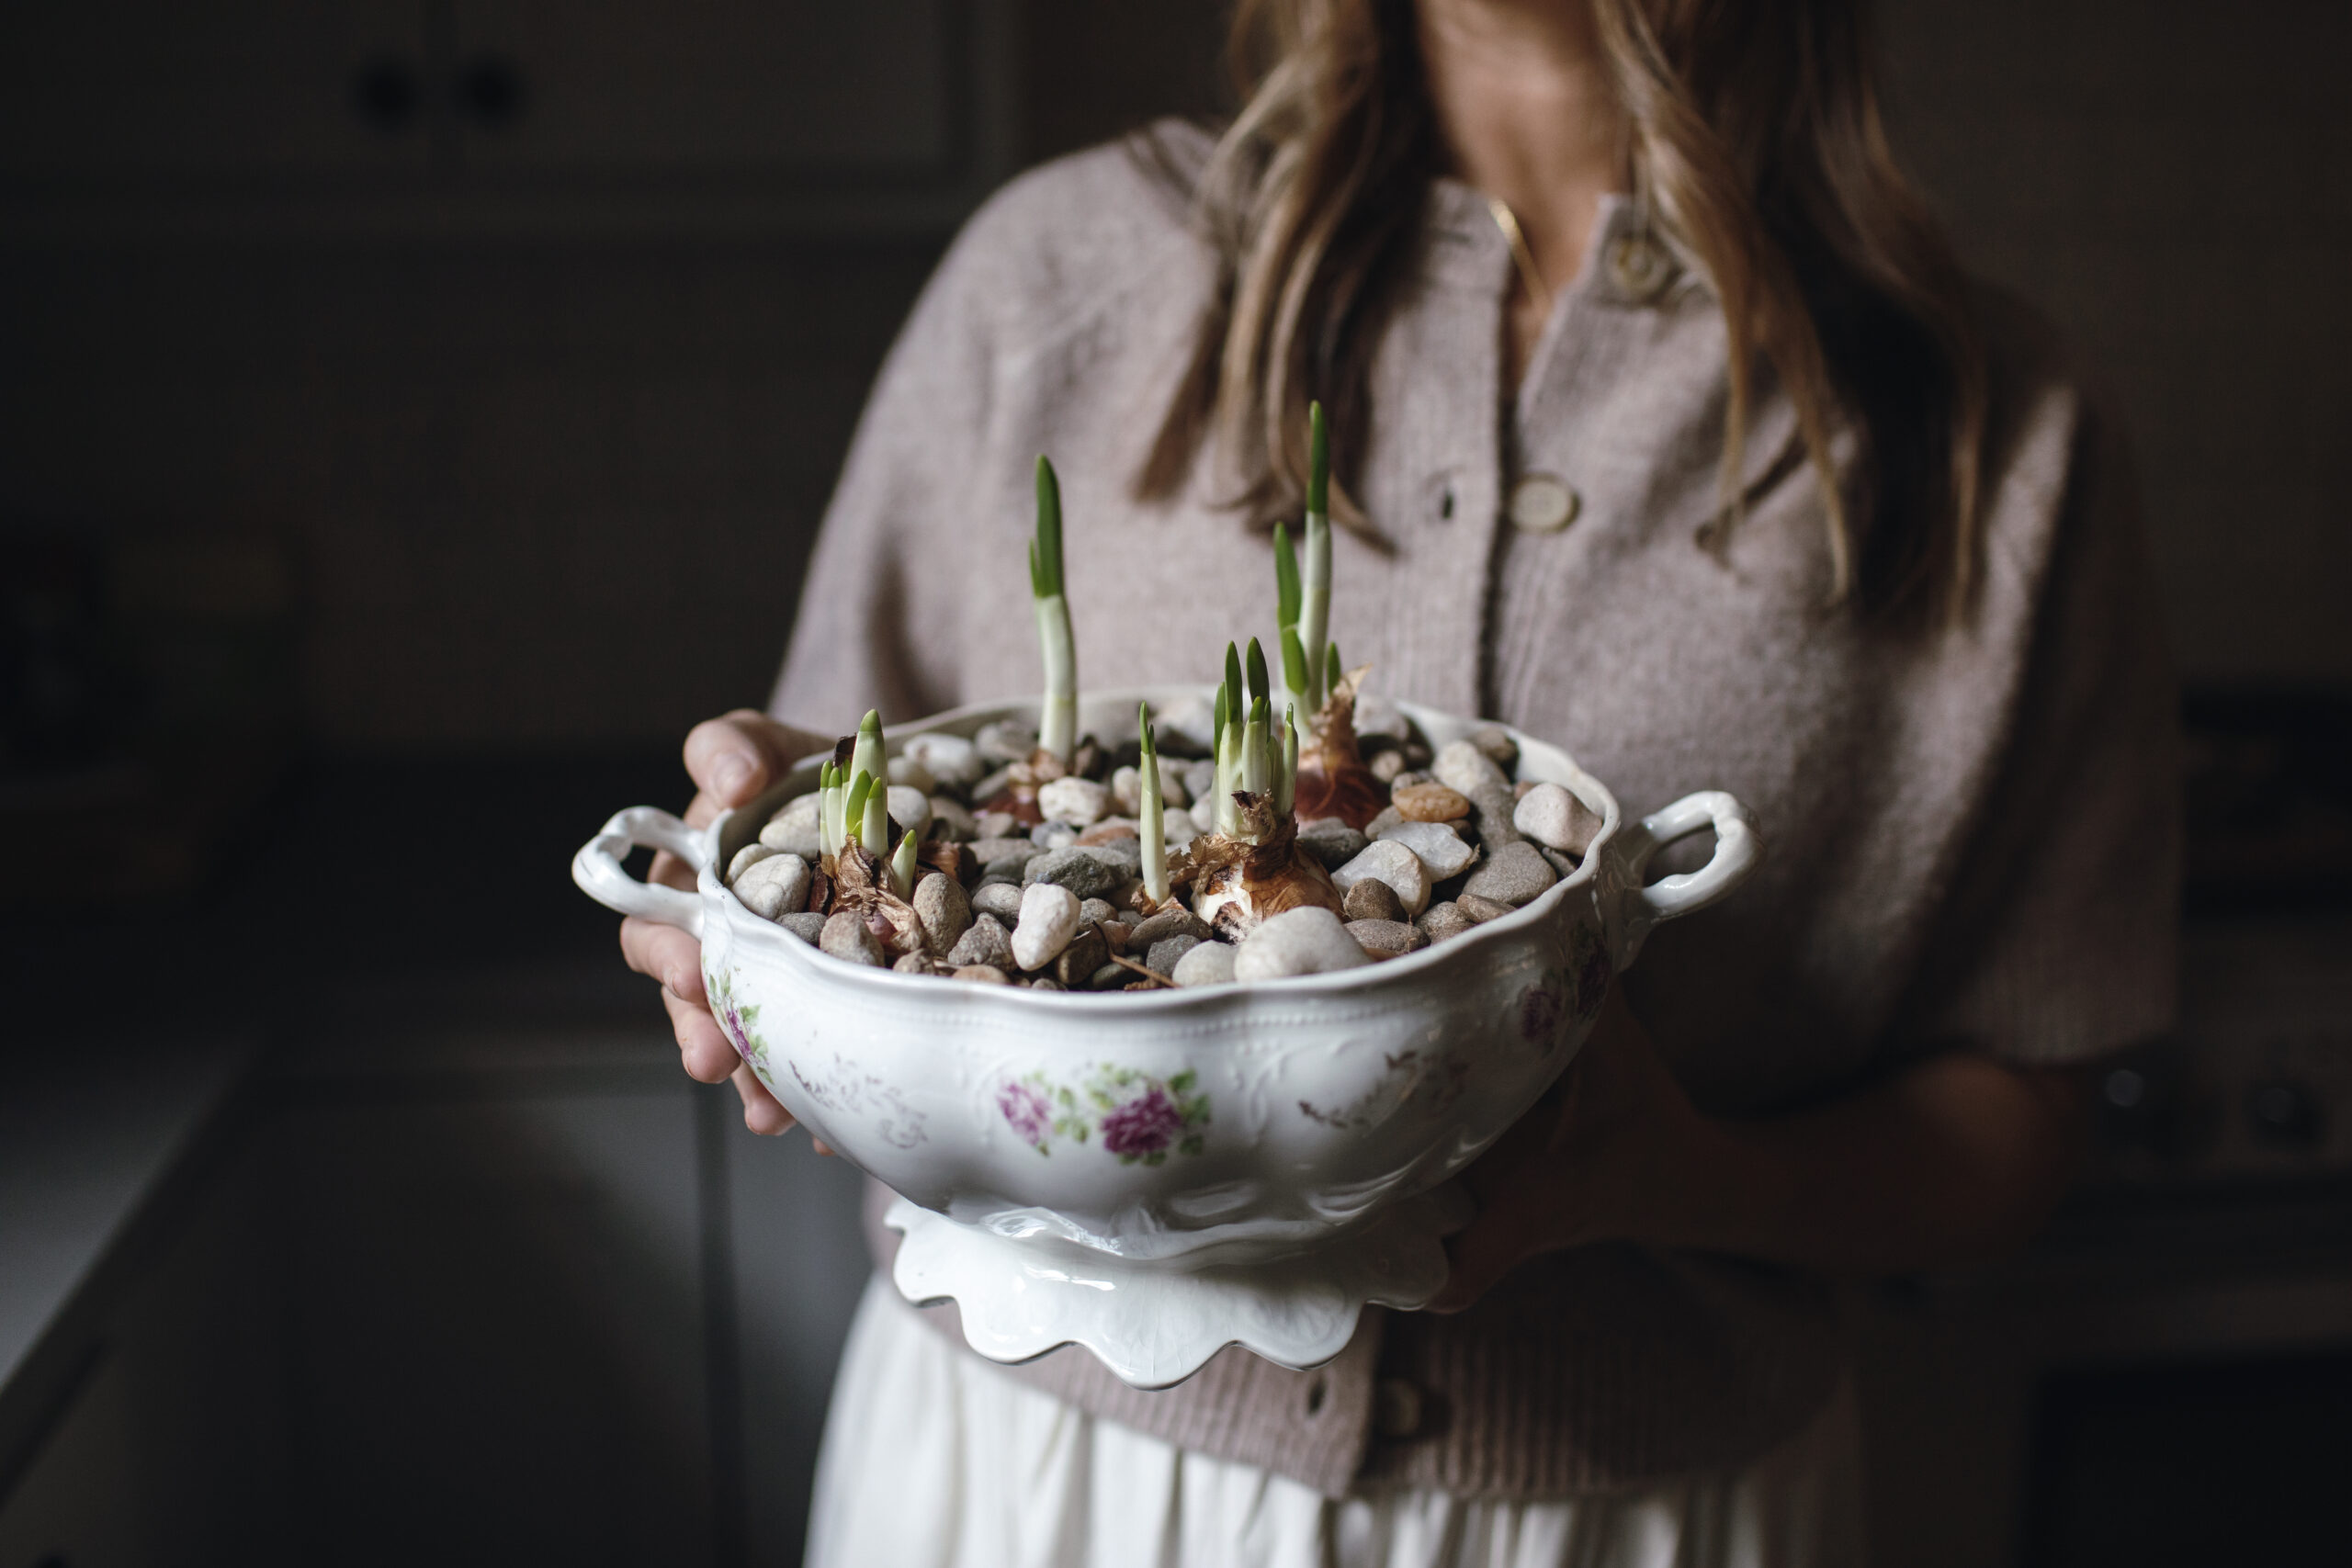
Over the years, planting paperwhite bulbs indoors has become one of my favorite winter rituals. I tuck them into collected teacups, old tureens, and pieces of vintage china that have been waiting for a new purpose. It is part gardening, part storytelling, and part gift giving. These small arrangements have become something I look forward to sharing with friends during the holidays and well into winter.
Below is exactly how I plant paperwhite bulbs indoors, along with a few simple tips I have learned along the way to keep them upright, beautiful, and gift ready.

Why Paperwhites Are Perfect for Indoor Planting
Paperwhites are a variety of narcissus that do not require a cold period to bloom. That means no chilling, no complicated prep, and no waiting for spring. You can plant them indoors in soil, water, gravel, or pebbles, and they will reliably bloom within four to six weeks.
They also happen to be perfect for nontraditional containers. Teacups, bowls, tureens, and small collected vessels all work beautifully, which makes them ideal for anyone who loves layering beauty and function in the home.
What You Will Need
-
A shallow container with no drainage holes
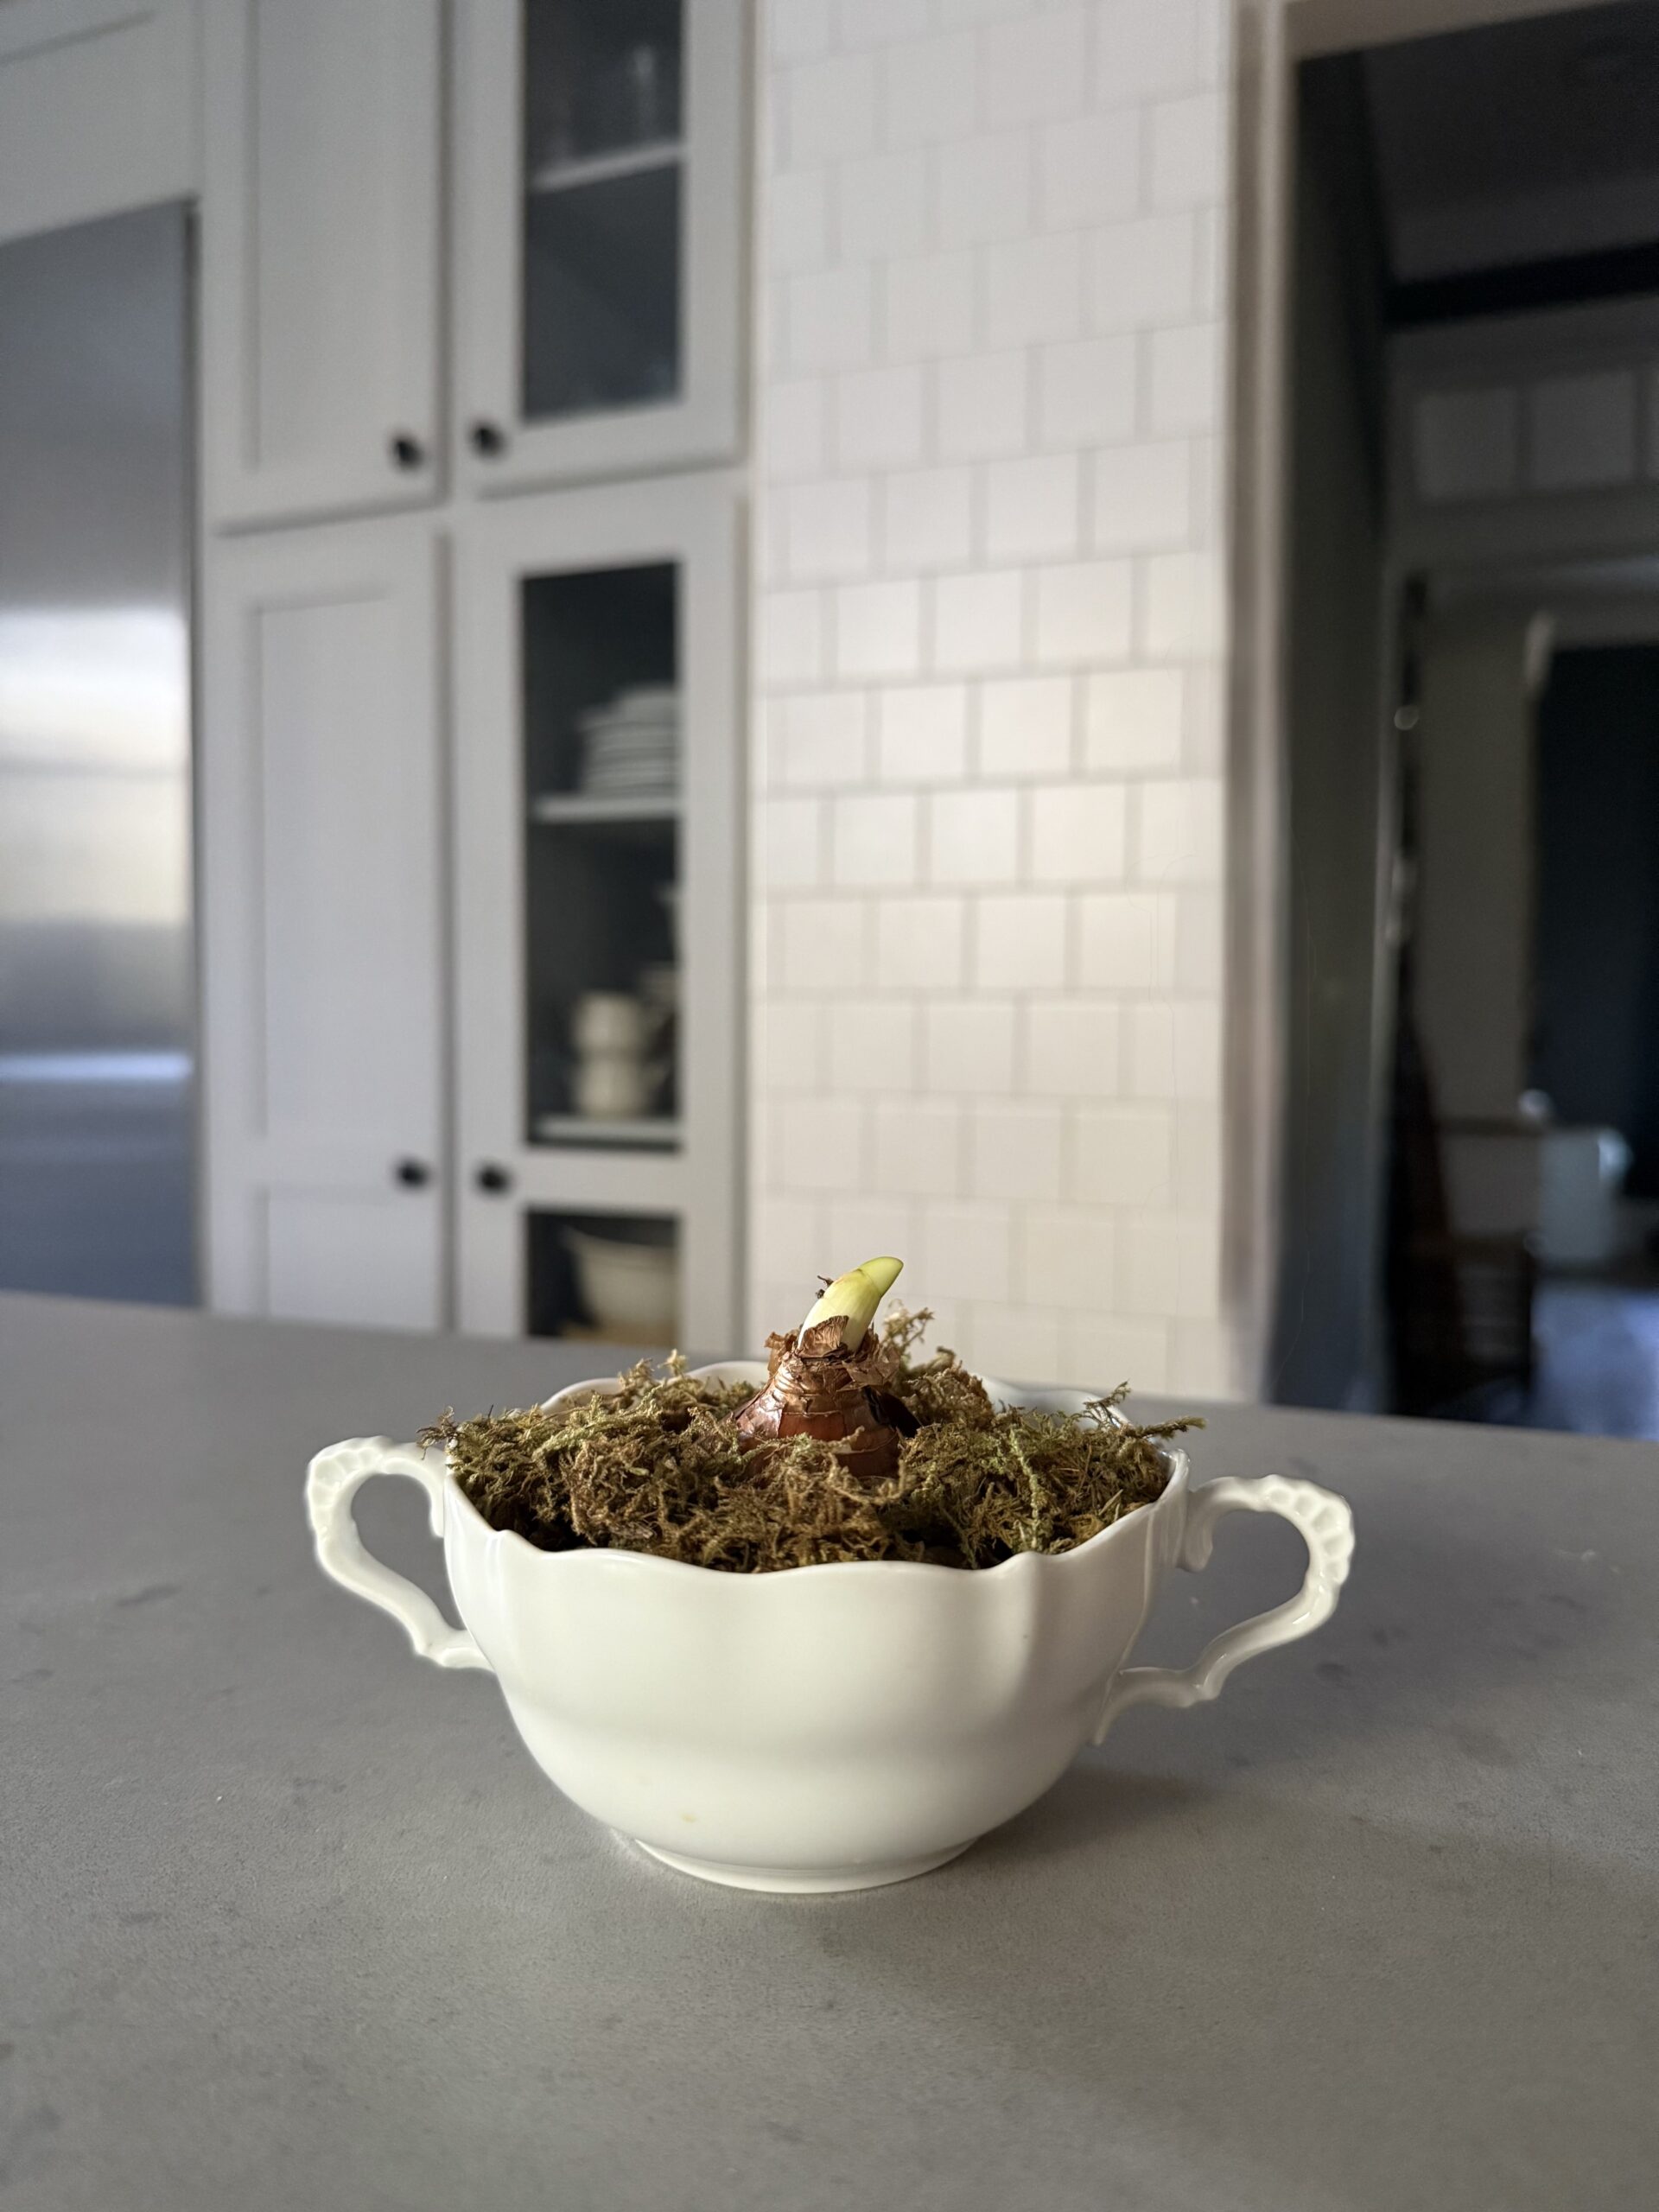
- Dried moss
-
Water
- Vodka (for the plant, not for you)
-
Optional ribbon and wooden skewers for staking
I often reach for vintage tureens, teacups, or small bowls from my collection. These pieces were made to be used and loved, and planting bulbs in them gives them a second life. You can find similar vintage vessels in my curated collection of teacups and tureens on Heirloomed Collection if you are looking to start your own tradition.
How to Plant Paperwhite Bulbs Indoors
Step 1. Prepare the container
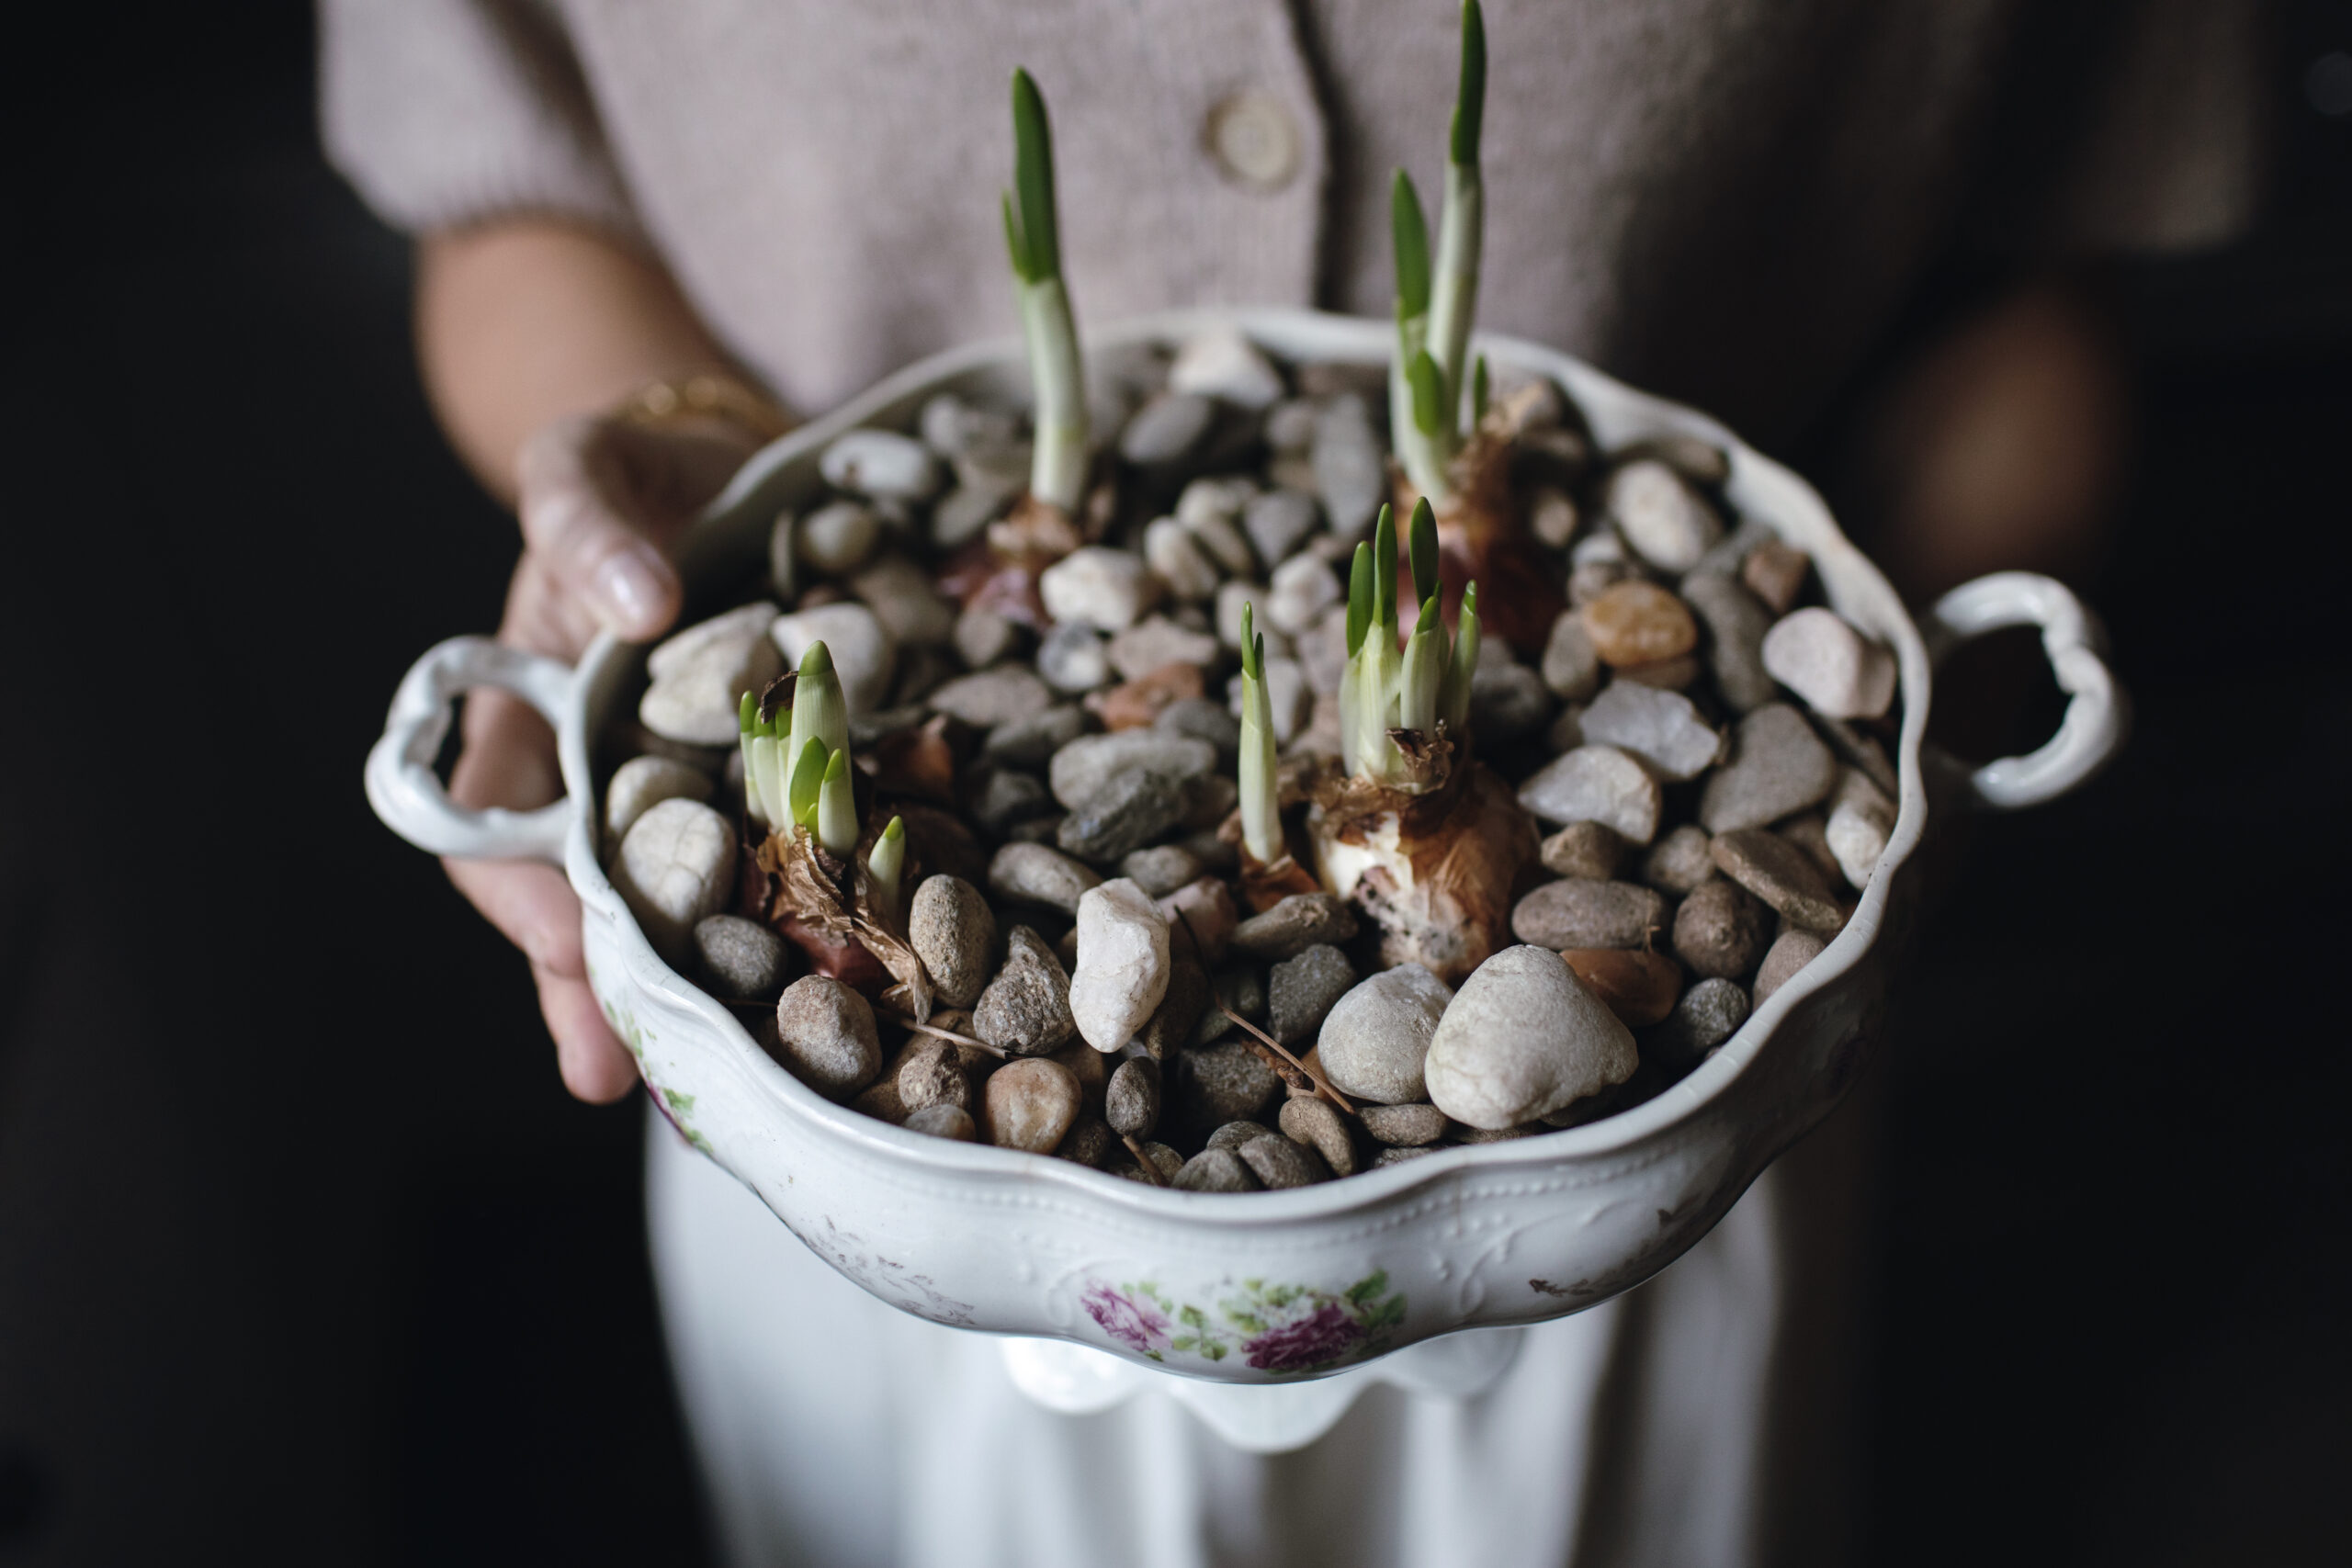
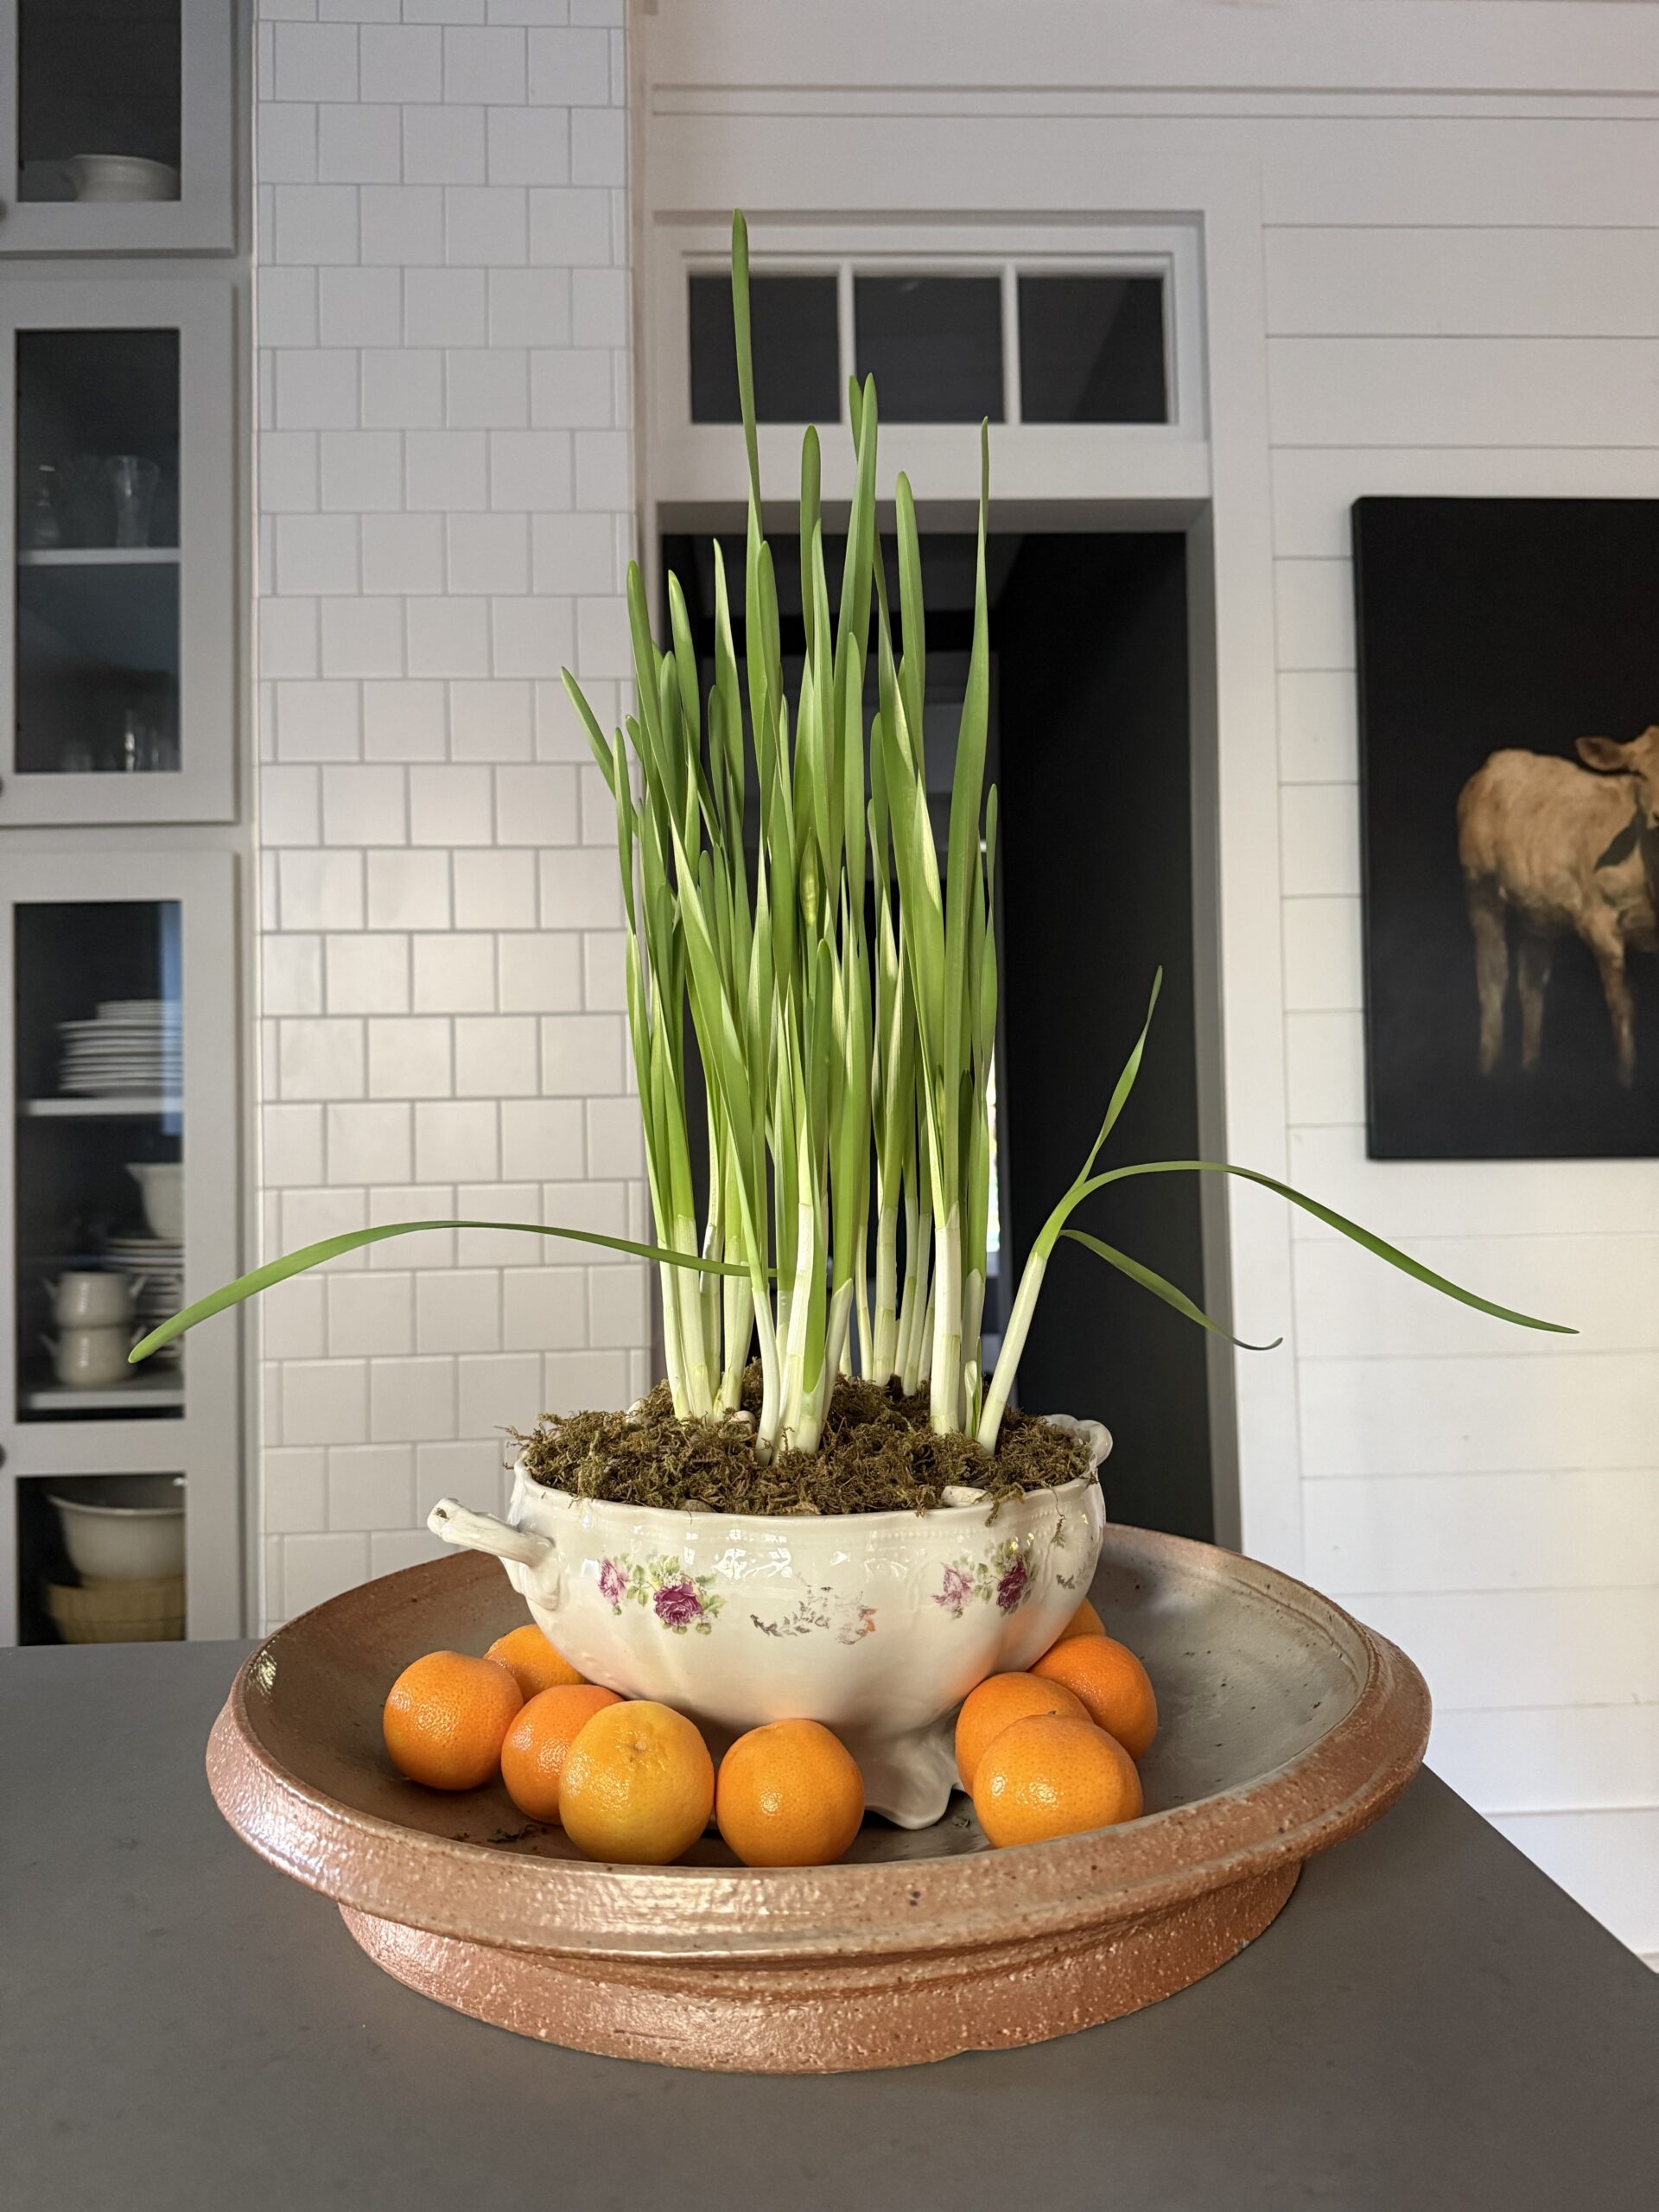
Fill your container with gravel or pebbles, leaving about one inch of space at the top. Nestle the bulbs into the stones with the pointed end facing up. I like to plant them close together so they feel full and intentional.
Step 2. Add water
Pour water into the container until it reaches just the base of the bulbs. The bulbs should not sit fully submerged in water. They only need moisture at the bottom to encourage root growth.
Step 3. Place in bright light
Set your planted bulbs in a bright spot out of direct sunlight. A kitchen counter, breakfast room, or sunny shelf works beautifully.
Within a week or two, you will see roots forming and green shoots emerging. Blooms usually follow a few weeks later.
A Simple Trick to Prevent Tall, Floppy Paperwhites
Paperwhites are known for growing quickly and sometimes too tall for their own good. Over the years, I have learned two simple tricks to keep them upright and elegant.
The vodka water method
Once the green shoots are about one to two inches tall, replace the plain water with a mixture of one part vodka to seven parts water. This slows the plant’s growth slightly without harming the blooms and helps prevent the long, floppy stems paperwhites are known for.
This sounds a little old fashioned, but it works beautifully and has become part of my routine every winter.
Gentle staking with a skewer and ribbon
For containers that will be gifted or displayed prominently, I sometimes add a simple stake. A wooden skewer placed carefully into the gravel alongside the stems gives just enough support. I then loosely tie a ribbon around the stems and skewer together.
It keeps the plant upright and adds a festive, thoughtful detail that makes the arrangement feel finished and gift ready.

Caring for Paperwhites Indoors
-
Keep the water level just at the base of the bulbs
-
Refresh the water every few days
-
Rotate the container occasionally so the stems grow evenly toward the light
-
Once in bloom, cooler temperatures will help the flowers last longer
Paperwhites have a strong fragrance, which I love, but if you are sensitive to scent, placing them in a larger room or near an open window helps.
Using Vintage Vessels as Planters
One of my favorite parts of planting paperwhites indoors is choosing the container. Gardening with vintage pieces has given so many of my collected vessels a new sense of purpose. A vintage teacup that once sat on a shelf now blooms on the breakfast table. A vintage tureen that felt too precious to use becomes the centerpiece of winter gatherings.
There is something deeply satisfying about letting these pieces live again in a new way. If you are drawn to this idea, I have curated a collection of vintage teacups and tureens on Heirloomed Collection that are especially beautiful for planting paperwhites indoors.
A Simple Winter Tradition Worth Keeping
Planting paperwhite bulbs indoors has become one of those small seasonal rituals I return to year after year. It slows the pace of winter, brings beauty into the everyday, and offers an easy way to share something meaningful with others.
Whether you plant them in a single teacup for yourself or line a table with collected vessels filled with blooms, paperwhites are a reminder that even in the quietest seasons, something beautiful is always growing.