Vintage plate walls offer a charming and elegant way to add personality to your home décor. Whether you’re a seasoned collector or a novice enthusiast, creating a captivating vintage plate wall can transform any space into a timeless masterpiece. In this step-by-step guide, we’ll walk you through the process of curating and arranging vintage plates to achieve a stunning display that reflects your unique style.
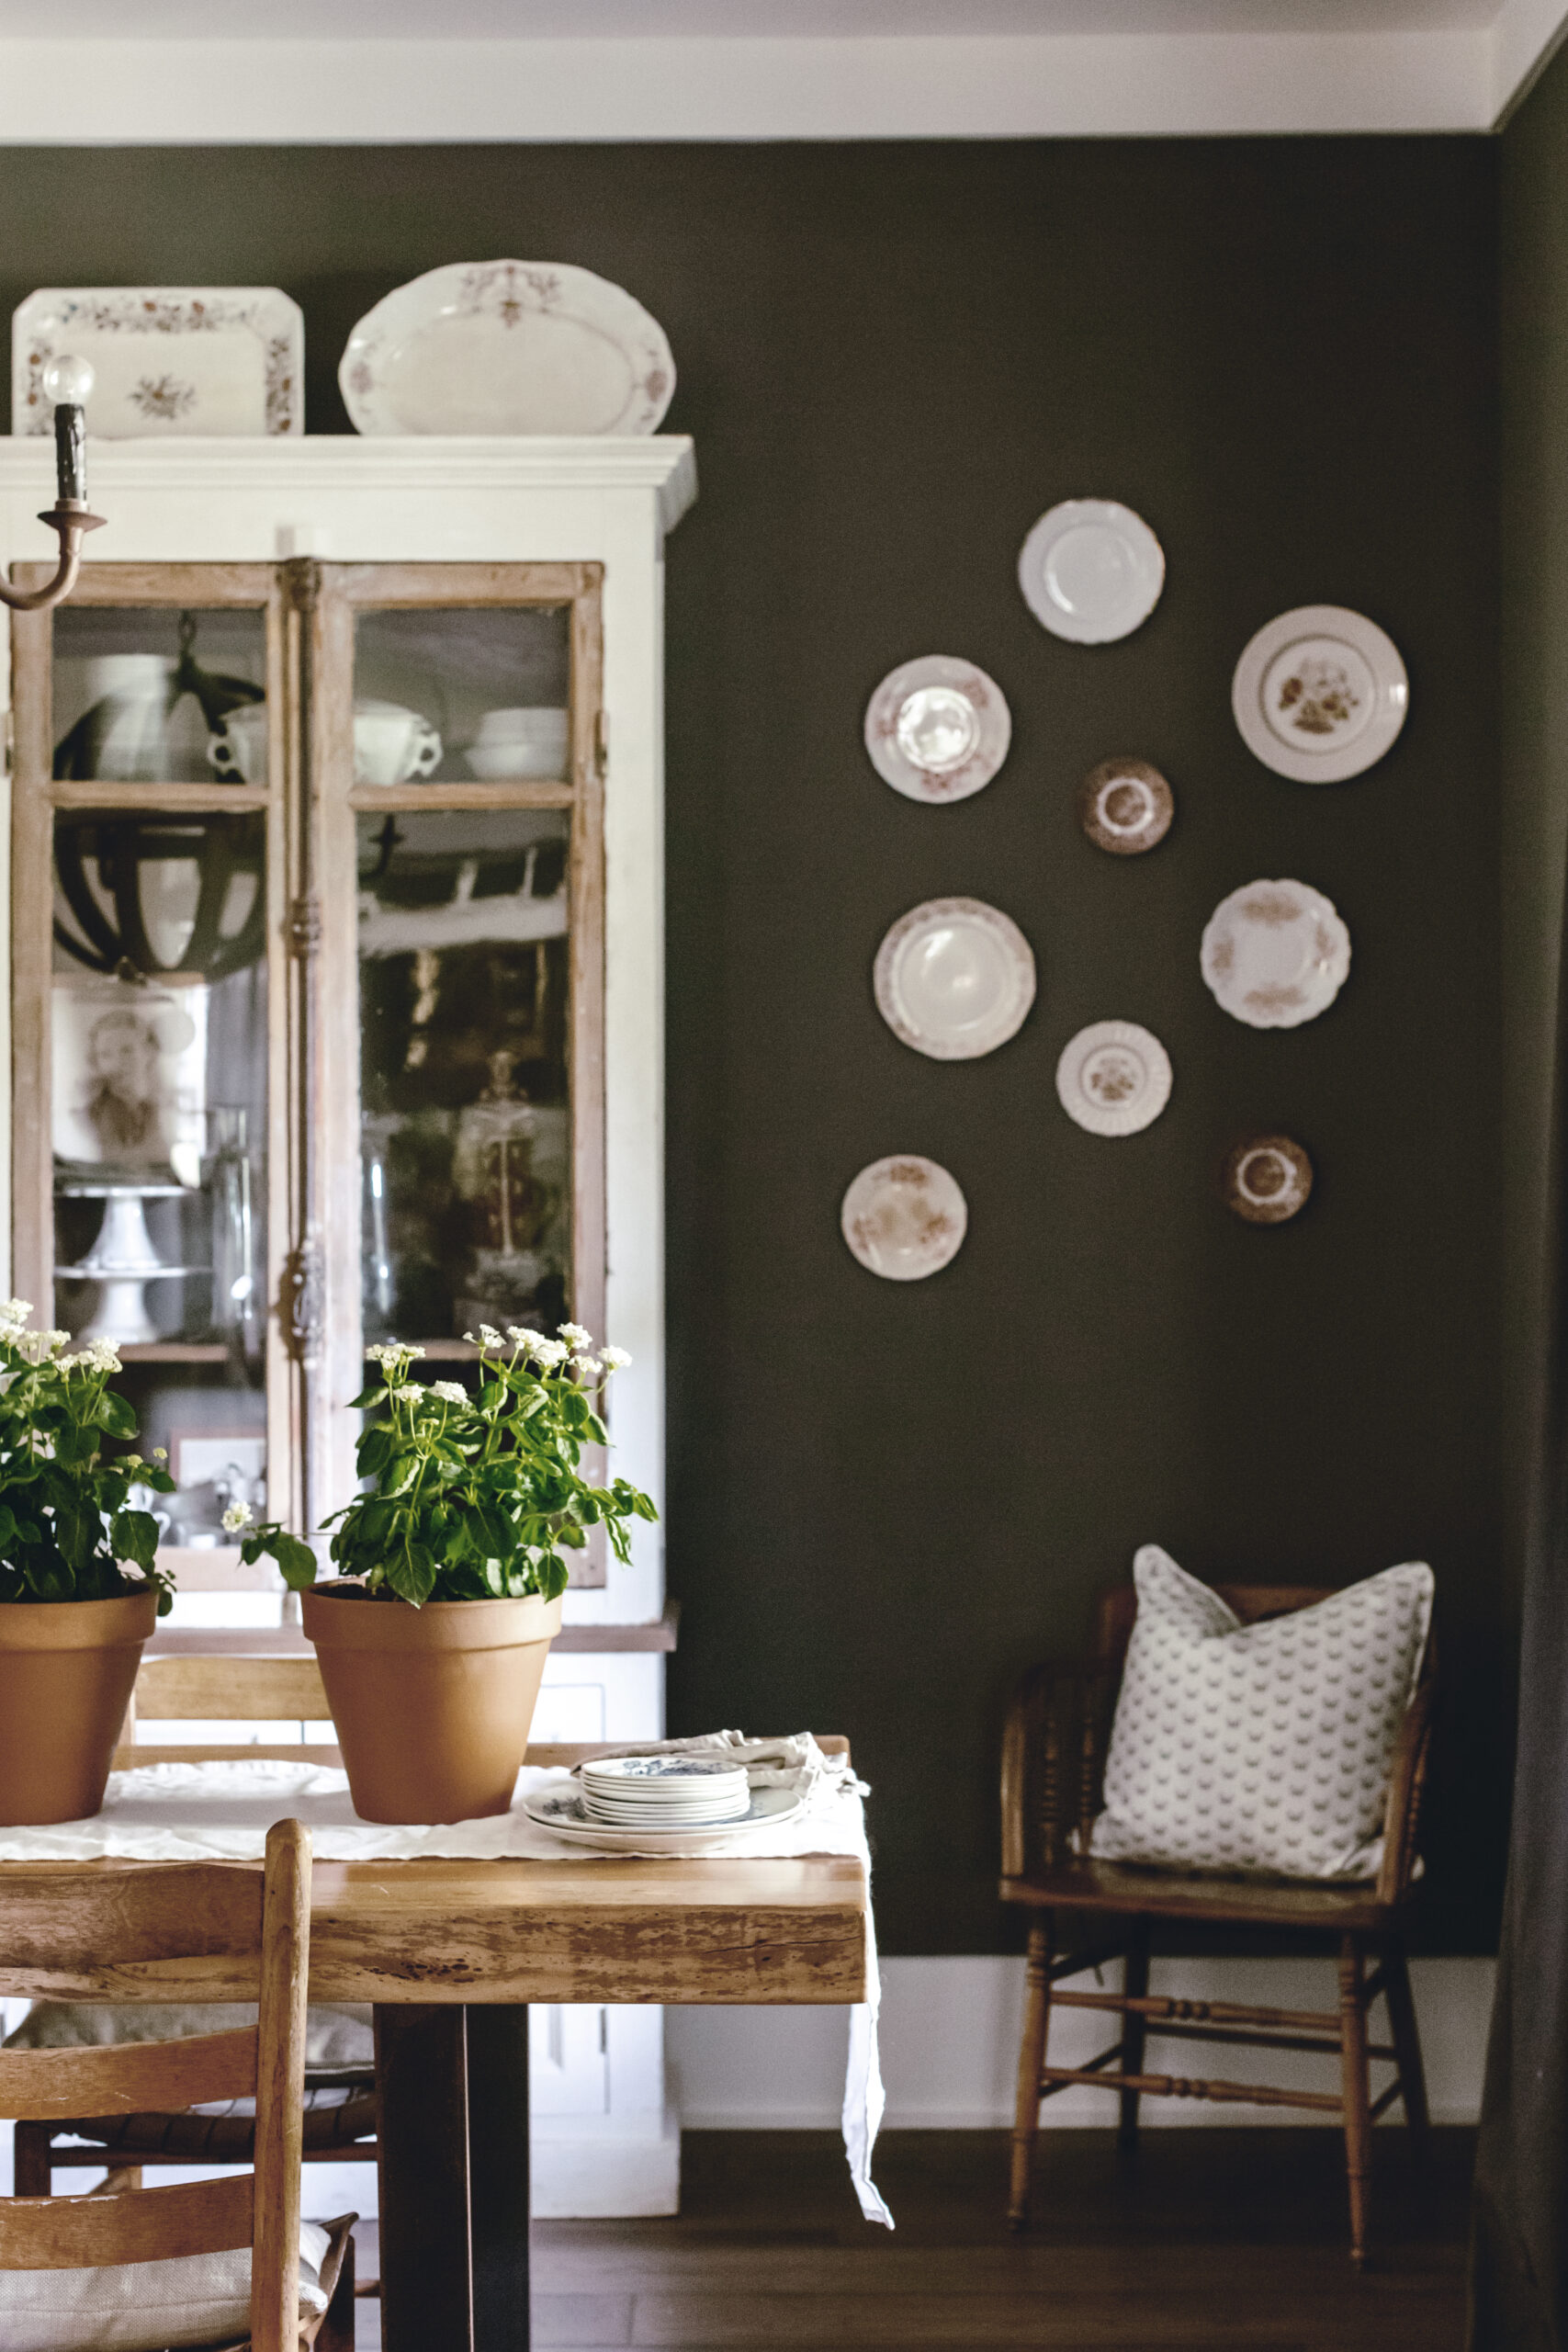
If there is one thing I love, it’s taking vintage items with a ton of patina and character and using them in your home interiors to make a beautiful, timeless statement. I have been gathering a selection of curated vintage transferware plates for my dining room to make a large vintage plate wall display around the wall where my china hutch sits. I had a vision for the space and decided I wanted to use plates with a range of more neutrals and browns, a color way that proved to be a bit harder to source than some others.
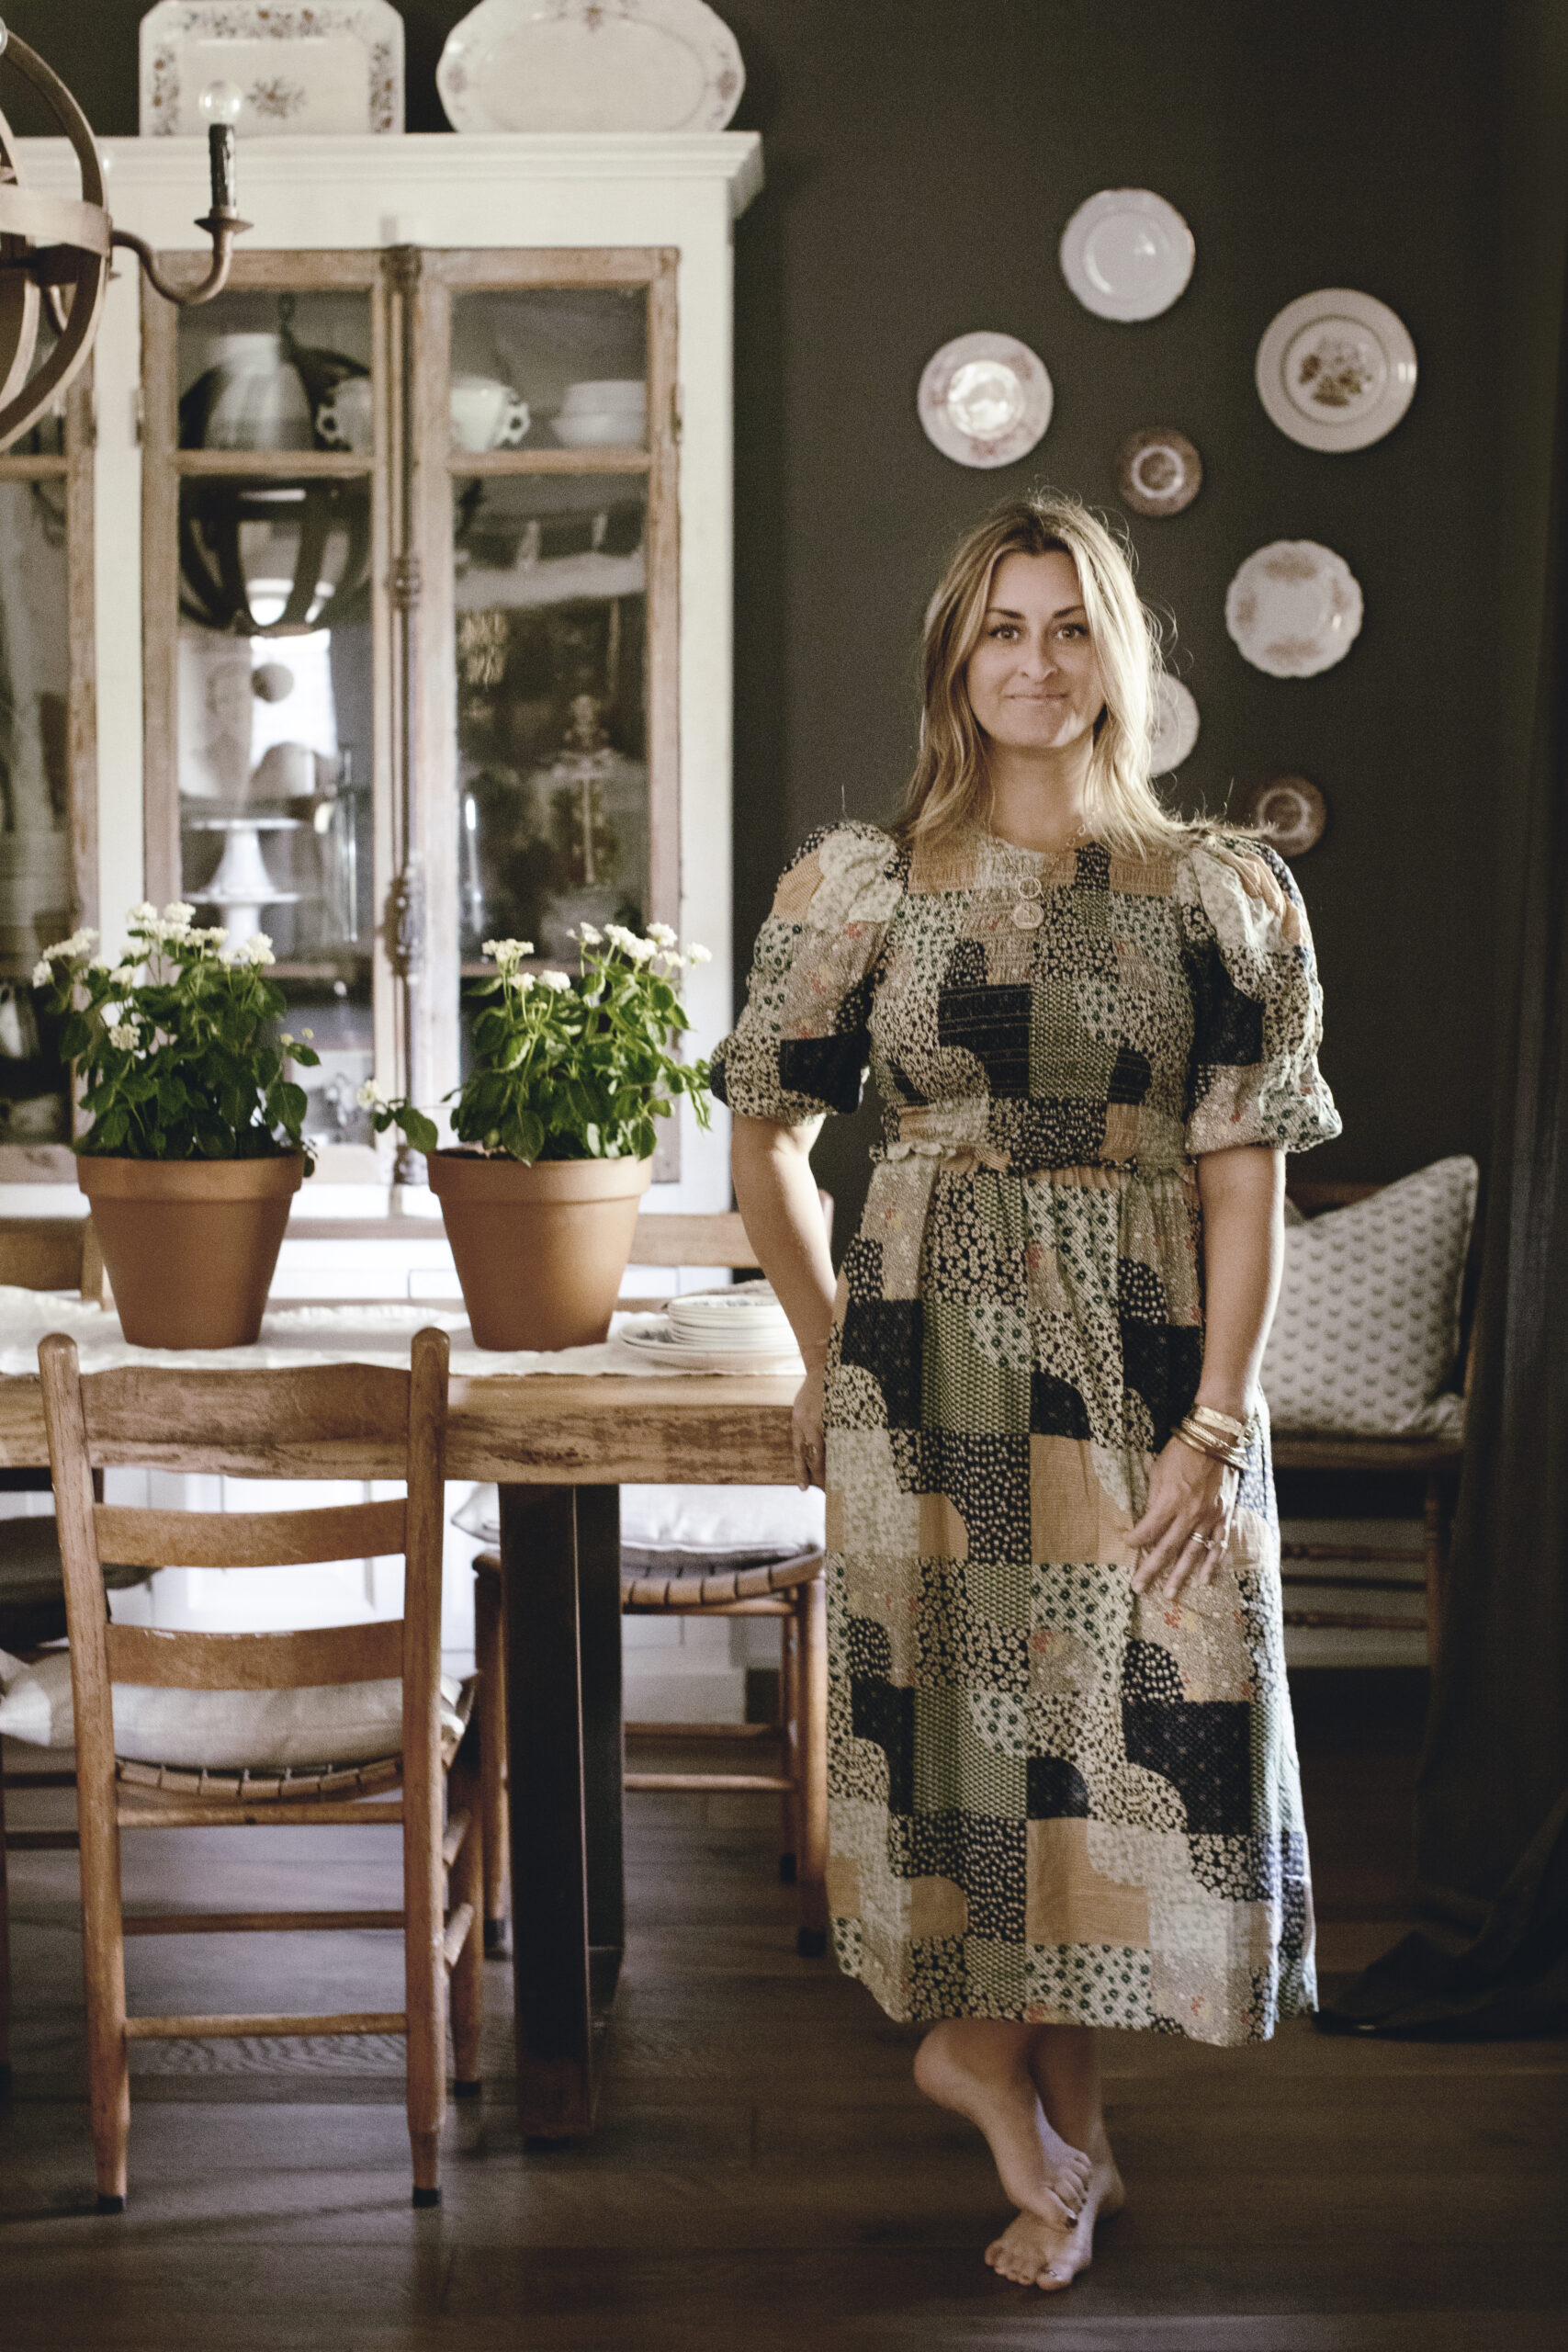
shop my patchwork dress / Sea New York
I also decided I wanted to use vintage transferware platters above the hutch. Since it’s a large wall and the hutch is large too, I wanted something more substantial in size up there to really ground the display and not seem too dinky. I loved the process of collecting the plates over a few months and am working to gather enough to fill the other side of the wall as well. That’s the fun thing about mixing in antiques, heirlooms and other elements for your home – it’s always a work in progress and you have to have patience to not just get it done but to wait until you come across just the right pieces to fill the space.
Today I’m sharing A step-by-step guide to creating a stunning vintage plate wall in your own home.
![]()
Step 1: Gather Your Supplies Before you begin, gather the necessary supplies:
- Vintage plates in various sizes and designs
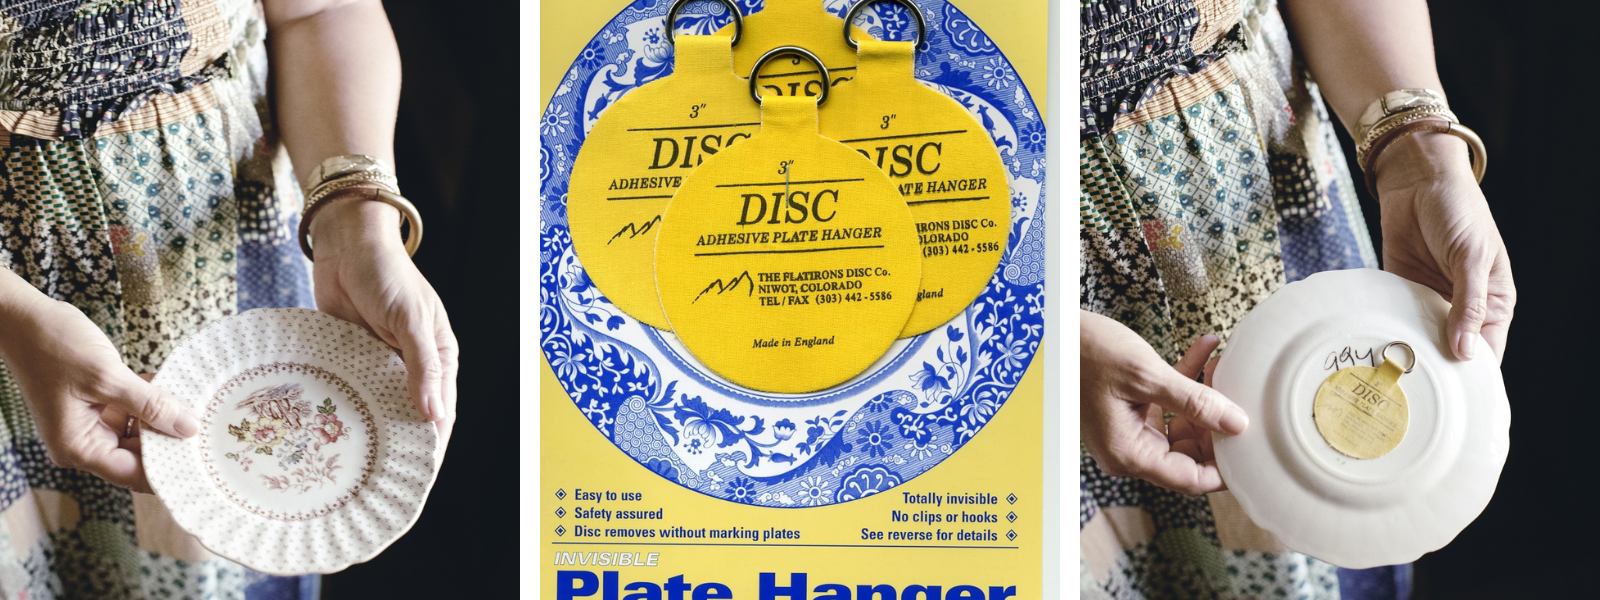
- Plate hangers or adhesive disc hangers
- These are my favorite plate hangers, as they are adhesive and hidden. Measure the plate size and be sure to use the one with the right strength / sizing
- Measuring tape and level
- Pencil for marking
- Optional: Decorative hooks, frames, or accent lighting
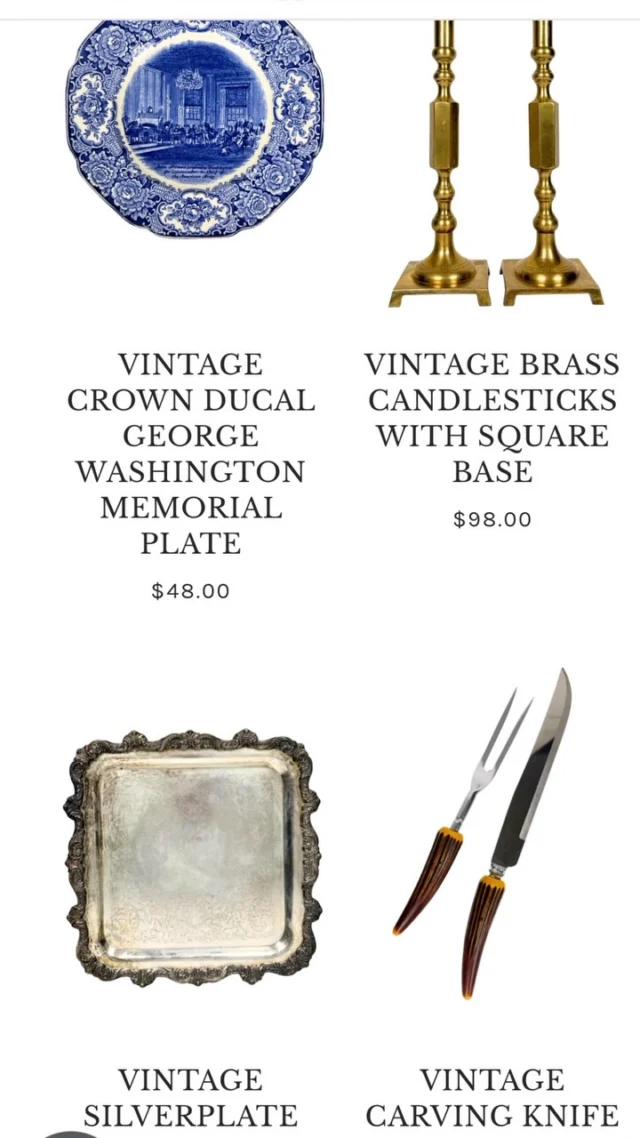
Step 2: Source Vintage Transferware Plates Explore local antique stores, flea markets, online marketplaces, and estate sales to source vintage transferware plates. We’ve also curated a beautiful assortment of vintage transferware over at Heirloomed, and even blue & white transferware pieces too. Look for plates with intricate patterns, historical illustrations, or thematic motifs that resonate with your personal style. Consider choosing plates in a specific color palette or theme to create a cohesive look for your vintage plate wall.
![]()
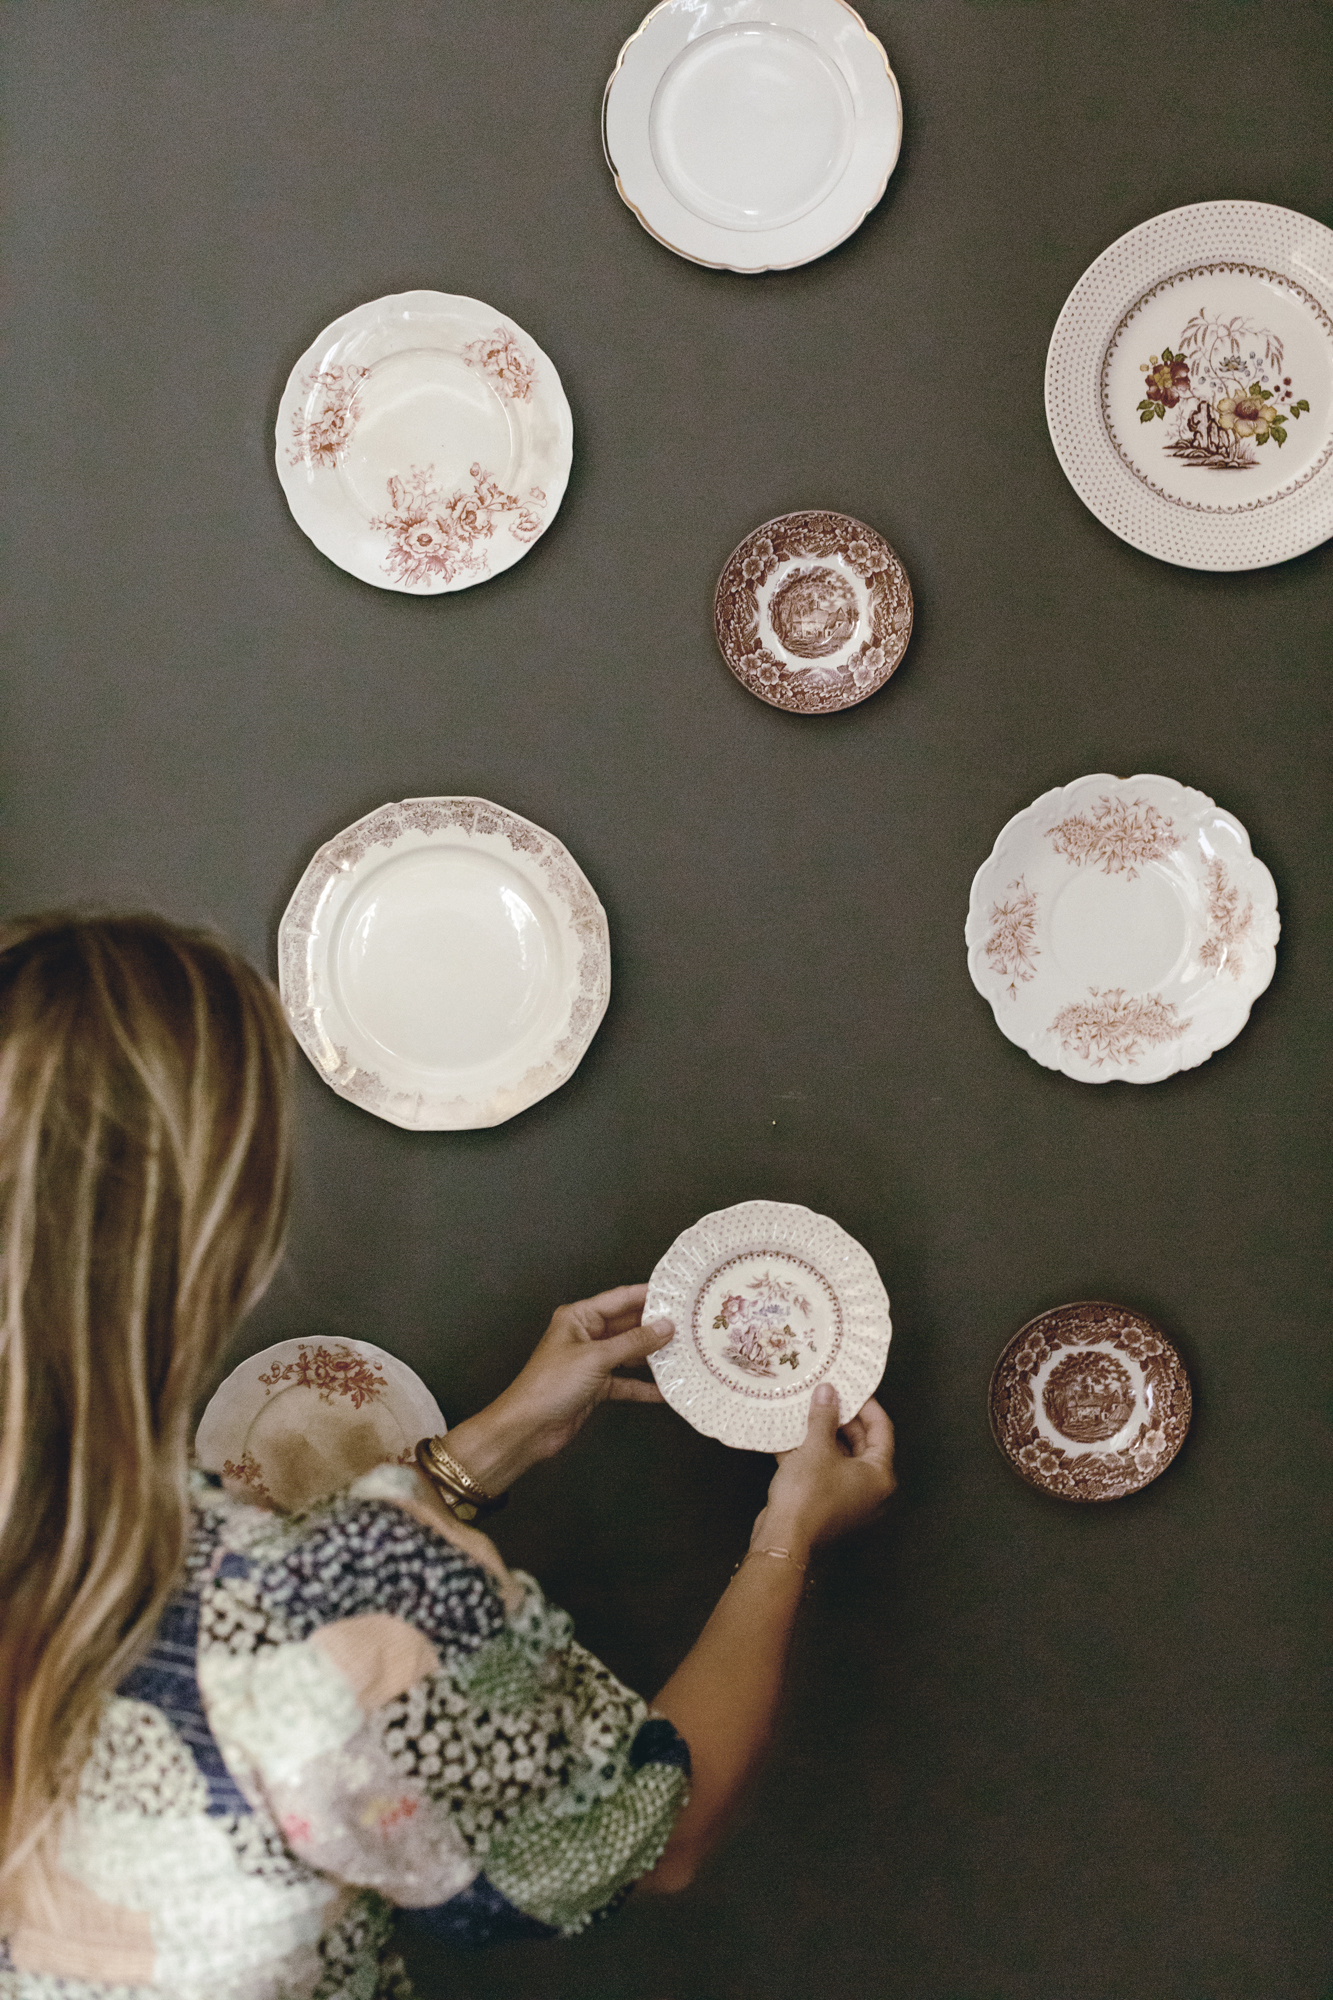
Step 3: Plan Your Layout Take measurements of the wall space where you plan to hang your vintage plate display. Consider the available space and any existing décor elements. Use painter’s tape or paper cutouts to map out different layout options on the wall. Experiment with arrangements until you find a layout that complements the space. Here you can get creative and just go with what feels right visually based on the plates you have curated.
Step 4: Prepare the Plates Inspect each vintage plate for any damage or imperfections. I actually don’t mind a chip or crazing on my plate wall plates. Sometimes that is a great use for those slightly imperfect pieces honestly. Clean the plates gently with mild soap and water, taking care not to damage the delicate designs (this step is really important, do not skip it or the adhesives may not stick well). Allow the plates to dry completely before proceeding. If using plate hangers, attach them to the back of each plate according to the manufacturer’s instructions. Alternatively, apply adhesive disc hangers for a more discreet mounting option.
Step 5: Hang the Plates Using your layout plan as a guide, begin hanging the plates on the wall. Start with the largest or most prominent plates as focal points and fill in the surrounding space with smaller plates. Use a measuring tape and level to ensure each plate is hung evenly. Adjust the placement as needed to achieve a balanced and visually appealing arrangement.
Step 6: Add Decorative Elements (Optional) Enhance your vintage plate wall with decorative elements to elevate the overall aesthetic. Consider incorporating ornate frames, antler mounts, small framed artwork, decorative hooks, or accent lighting to highlight specific plates or create focal points. Experiment with different accessories to add depth and dimension to your display while staying true to the vintage aesthetic.
Step 7: Step Back and Assess Once you’ve hung all the plates and added any desired decorative elements, step back and assess the overall arrangement. Take note of any adjustments that may be needed to improve the balance and visual flow of the display. Make any necessary tweaks to achieve the desired look and feel.
Step 8: Enjoy Your Vintage Plate Wall Now this is the MOST important step friends. Enjoy every minute of your new plate wall, you did it! With your vintage plate wall complete, take a moment to admire your handiwork. Your carefully curated display is sure to become a focal point of your home, sparking conversation and admiration from guests. Sit back, relax, and enjoy the timeless beauty of your stunning vintage plate wall.
Creating a vintage plate wall is a rewarding DIY project that allows you to showcase your creativity and appreciation for timeless craftsmanship. By following this step-by-step guide and sourcing vintage transferware plates in a specific color or theme, you can curate a captivating display that adds charm and character to any space. Whether you’re drawn to delicate floral patterns or bold historical motifs, let your imagination soar as you embark on this decorating adventure.